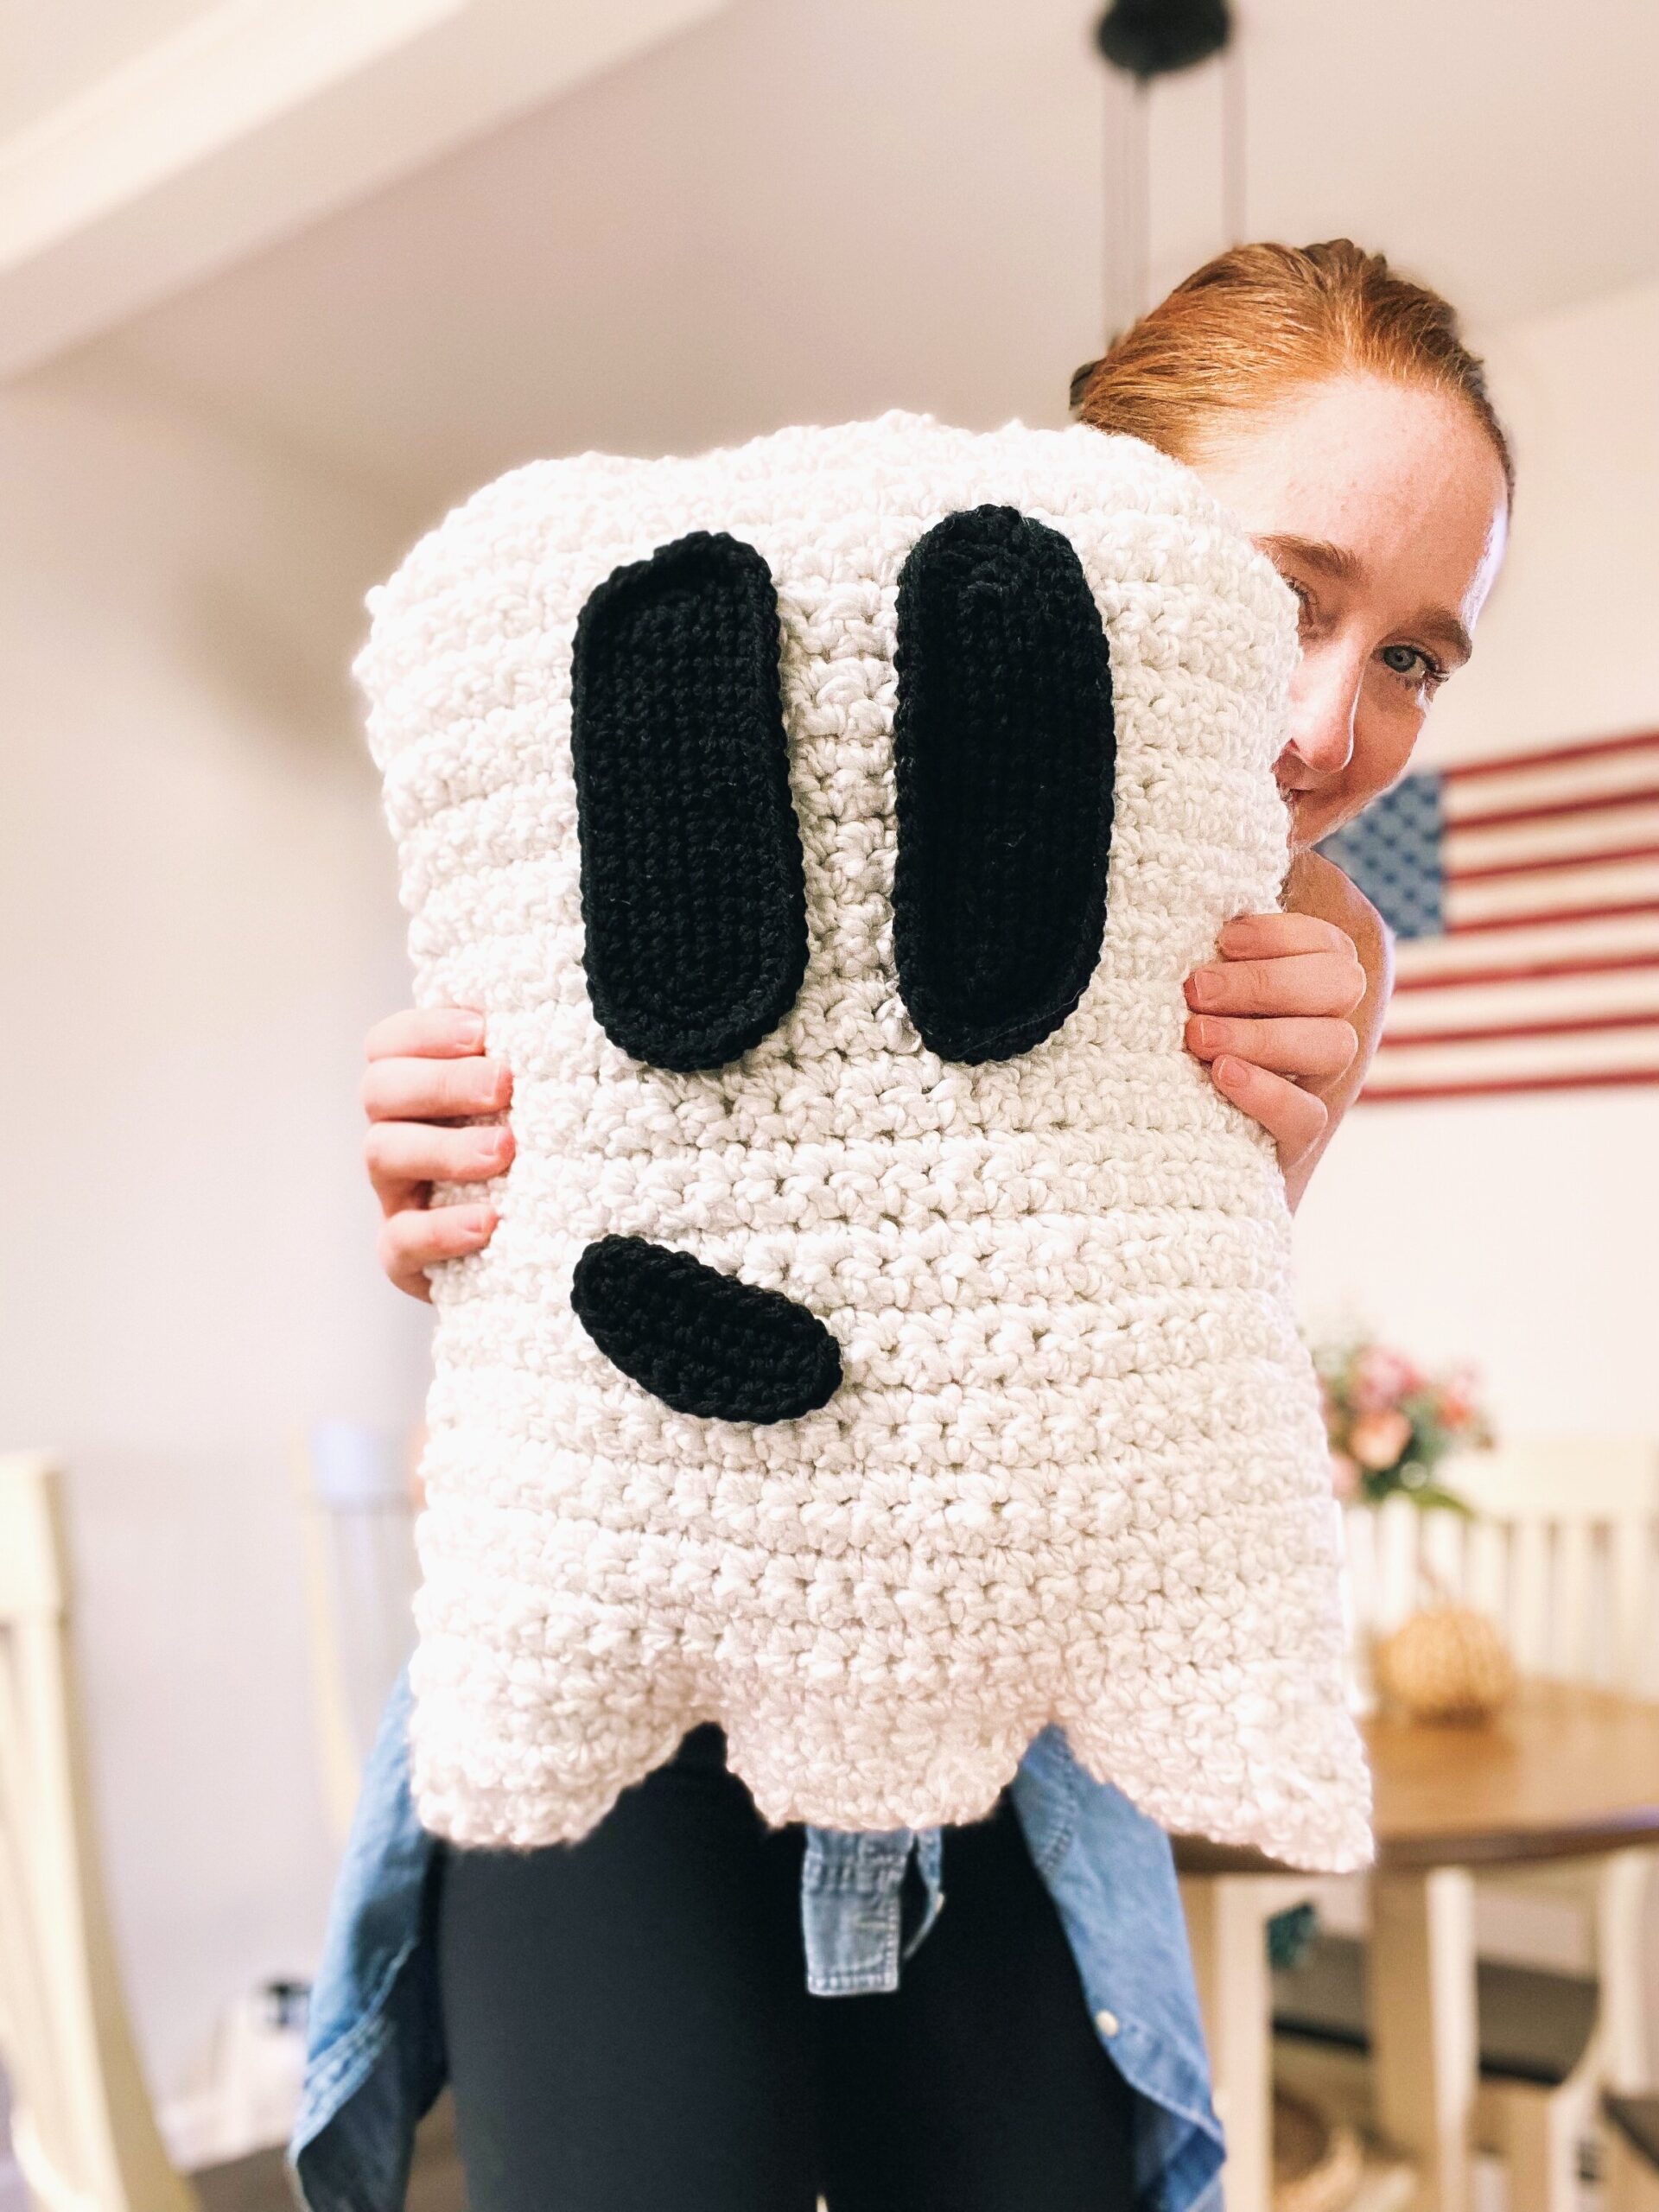
Urban Outfitters had this popular (and expensive) pillow that is now SOLD OUT. But don’t worry because I came up with this easy pattern so you can make a similar one!

For an AD FREE downloadable PDF version of this pattern, visit my Etsy shop HERE! I appreciate your support!
Level: Beginner
If you need any help with this pattern, please feel free to message my Etsy shop, DM me on Instagram @crochetbycolleen OR e-mail me crochetbycolleenUS@gmail.com
This pattern is available for personal use only. You cannot share or sell this written pattern. You can sell your own ghost pillow but please tag @crochetbycolleen for design credit. Thank you so much for your cooperation!
Head to www.crochetbycolleen.com for more FREE PATTERNS! Make sure to join my community by entering in your email address for my newsletter! You’ll never miss a free pattern, news or update! 🙂
YOU WILL NEED
-
3 skeins of Homespun from Lion Brand in HeppleWhite—- linked HERE
-
1 skein of back 4 medium weight acrylic yarn —- linked HERE
-
9mm hook 5mm crochet hook—- linked HERE
-
Tapestry Needle
-
Fiber fill —- linked HERE
The stitches/ skills you will need to know and KEY:
-
Chain (ch)
-
Slip Stitch (sl st)
-
Single crochet (sc)
-
Half double crochet (hdc)
-
Double crochet (dc)
-
Decrease (dec)
-
Increase (inc)
-
Weave ends and finish off.
Full video tutorial HERE:

CROCHET PATTERN
Front and back panel of ghost:
Using two strands of homespun on a 9mm hook, chain 25
Row 1: single crochet in the second chain from the hook, sc across across the rest of the chains (24 sc)
Row 2-30: sc across (24 sc)
You can also measure 12 inches wide and row 30 should be 11 inches tall.
Row 31: dec, sc in the next 20 sc, dec (22 sts)
Row 32: dec, sc in the next 18 sc, dec (20 sts)
Row 33: dec, sc in the next 16 sc, dec (18 sts)
Row 34: dec, sc in the next 14 sc, dec (16 sts)
Row 35: dec, sc in the next 4 sc, hdc, dc, dc, hdc, sc in the next 4 sc, dec (14 sts)
Finish off and weave ends.
Right and left bottom ripple:
Row 1: Turn your work over you will now be attaching the yarn to the right corner of row 1 (it doesn’t matter which side) sc in the first stitches (8sc)
Row 2: dec, sc in the next 4 sc, dec (6 sts)
Row 3: sc in the first 4 sc, dec (5 sts)
Row 4: dec, sc in the next 3 sc (4 sts)
Finish off and weave ends.
REPEAT THIS exactly on the other side. So you will need to turn the whole project over to you can start with the corner on the right side.
Center Ripple:
Row 1: insert with a sc in the stitch next to the right ripple, sc in the next 7 sts (8 sc)
Row 2: dec, sc in the next 4 sc, dec (6 sts)
Row 3: dec, sc in the next 2 sc, dec (4 sts)
Finish off and weave ends.
Repeat to make to full panels!
Eyes:
With black on a 5mm hook, chain 15 (working in rounds do not join)
Round 1: sc in the second chain from the hook, sc across. Make 3 sc total in the last chain from the hook, now you will be working up the other side of the chain, sc in the first 12 sts, make 2 sc in the last chain (30 sc)
Round 2: 2 sc in the first sc, sc 12, 2 sc in the next 3 sc, sc 12, 2 sc in the next 2 sc (36 sc)
Round 3: 1 sc in the next sc, 2 sc, sc 12, *1 sc, 2 sc* repeat from *—* two more times, sc 12, repeat from *—* 2 more times. (42 sc)
Round 4: *1 hdc in the next two stitches, 2 hdc in the next*, hdc 12, repeat from *—* three times, hdc 12, repeat *—* two more times. Finish off and weave ends.
MAKE TWO.
Mouth:
With black and 5mm hook, chain 9
Round 1: sc in the second chain from the hook, sc in the next 6 chains, 3 sc in the last chain, (now working up the other side of the chain) sc in the next 6 stitches, work 2 sc in the last stitch (18 sc) Continue working in rounds.
Round 2: 2 sc in the first stich, sc in the next 6 stitches, 2 sc in the next three stitches, dc in the next 6 stitches, 2 sc in the next two stitches. Finish off and weave ends.
Assembly:
Sew the eyes and mouth to one of the panels with black yarn and a tapestry needle. Take two pieces of the white yarn on a tapestry needle and sew the two panels together leaving space at the top to stuff with pillow with fiber fill.
Pin this pattern to Pinterest for later!


Save this next picture to your Pinterest:

