
You can get an AD FREE PDF Downloadable version of this pattern HERE
Level: Beginner
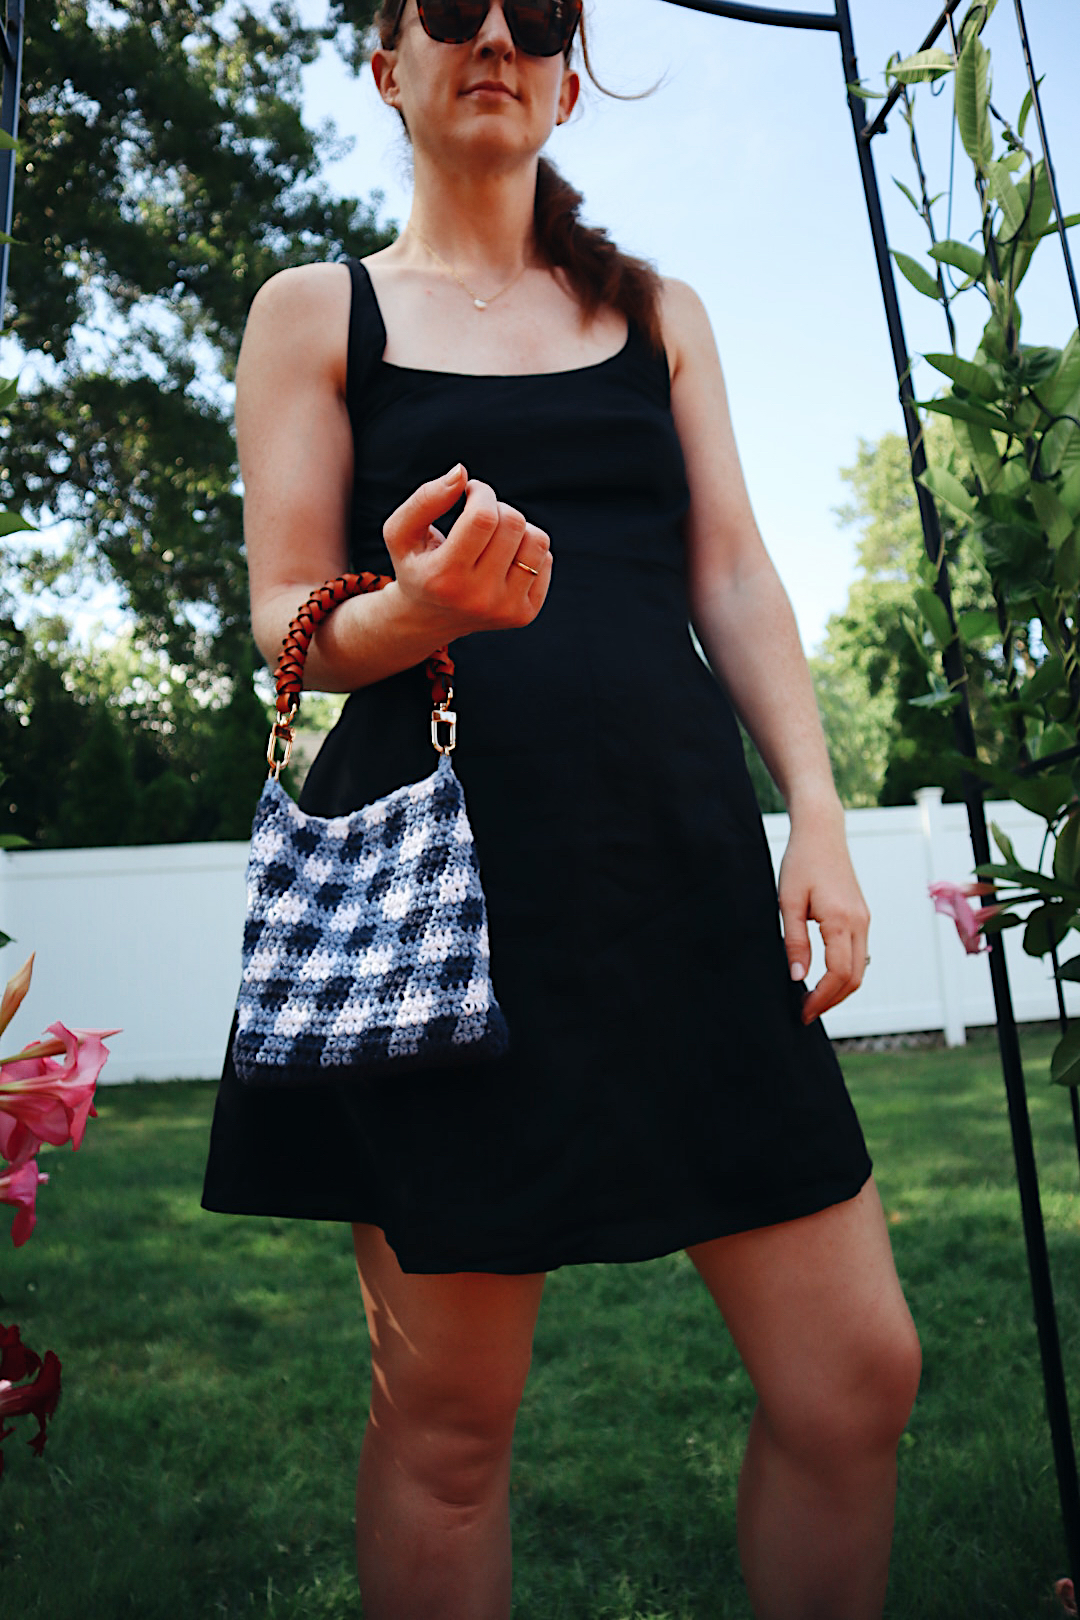
This bag is giving Coastal Grandmother and I’m not mad about it! I love this classic gingham print. I made this bag in the classic red and blue gingham colors but feel free to use whatever colors you want! I loved experimenting with switching colors and creating my favorite gingham print. I also loved adding this faux leather bag strap. I feel like it really elevated the look of the bag. I definitely see myself wearing this on date nights, going out for drinks, church, brunch or just to run errands! I hope you love this pattern and much as I do!
Let’s stay connected:
Sign up for my newsletter www.crochetbycolleen.com
Instagram @crochetbycolleen
TikTok @Crochetbycolleen
Watch the full YouTube tutorial HERE:
Dimensions: 7.5 inches tall X 7 inches wide
Gauge: 15 sts X 12 rows = 4 inches
Materials Needed:
Check out pattern all materials in my Amazon storefront: https://amzn.to/43ZL497
- 5mm crochet hook
- 1 skein of each
Red version: I Love This Cotton – Hobby Lobby – 4 Medium – Cotton
Color A- Red
Color B – Rosy II
Color C- White
Blue Version: I Love This Cotton – Hobby Lobby – 4 Medium – Cotton
Color A – Dark Denim
Color B- Stonewash Blue
Color C – White
- Tapestry Needle
- D- rings 1/2 inch
- 12.5 inch Leather Bag Handle
- Cotton fabric
- Sewing needle
- Sewing thread
Pattern Notes:
How to change colors: To change colors in this pattern, you’ll need to pick up the new color on the last stitch of the previous color. So if crocheting three stitches white, on the last white stitch, instead of pulling the white through the final time, pick up the next color and pull that next color through, yarn over and now continue with the new color.
This pattern is worked in rows because at the end of each round you will be attaching to the first stitch with sl st and chaining 2 to start a new row.
Stitches You’ll Need to Know (key):
Half Double Crochet – hdc
Slip stitch – sl st
Chain – ch

Pattern:
With color A, chain 25
Row 1: hdc in the third chain from the hook, chain in the next 21 chain spaces, make 3 hdc in the last chain (you will now be working on the other side of the chain) hdc in the next 21 stitches, 2 hdc in the last stitch. Join with a sl st to the first stitch, chain 2. Continue going in the same direction for each row. (48 sts)
Row 2: 2 hdc in the first stitch, hdc in the next 21 stitches, 2 hdc in the next 3 stitches, hdc in the next 21 sts, 2 hdc in the next 3 stitches (54 sts) join, chain 2
Row 3: continuing with color A, hdc in the next 2 stitches, on the last hdc join Color B to finish off the that stitch by pulling a loop through with Color B rather then Color A. You will now carry the color you are not using underneath the row by holding it inside the stitch. You will now repeat this all the way around, making three hdc with each color and switching to the next color on the last stitch of the previous color. Once you get to end of row 2, keep working with color A, join and chain 2 (54 sts)
Row 4: repeat row 3, at the very last stitch you will switch to Color B, join and chain 2 with color B
Rows 5- 6: repeat rows 3 & 4 but this time you’ll be working with Colors B and C
Rows 7- 21: keep repeating rows 3-6 until you get to the end of row 21. You’ll only do one row of Colors B and C. Finish off with a slip stitch, cut and weave ends.
Assembly:
D- rings: Using a long piece of yarn and a tapestry needle you’ll sew the D-rings to the sides of the bag. Sew the d-ring across three stitches in the last row. Secure it with about 6-7 stitches, make a knot and weave ends.
Attach the bag and strap and you’re done! Unless you want to add a fabric lining. If so, keep reading!

Optional Bag Lining (no sewing machine needed)
You’ll need a piece of fabric approximately 12 inches wide X 24 inches tall to make sure you have enough but I like to just get a yard and have plenty extra for future projects. I used cotton fabric from Hobby Lobby
Folder your fabric in half with the seam on the bottom
Lay your bag on top and line the bottom of the bag with the seam
Using a pencil, trace a seam allowance if .5 inches on the sides and on the top
Cut out your fabric and keep it folded
Pin the sides with sewing pins and with a running stitch, sew up the sides
Fold the top down by .5 inches (you can iron the fold to make it stay in place)
Place the fabric into the bag and like the sides up with the sides of the bag and pin into place
Then pin the fronts and backs then pin the rest
Using a running stitch, sew around the top of the fabric. You’ll want to only grab a little bit of yarn so you can’t see the sewing job from the outside of the bag.


